Description
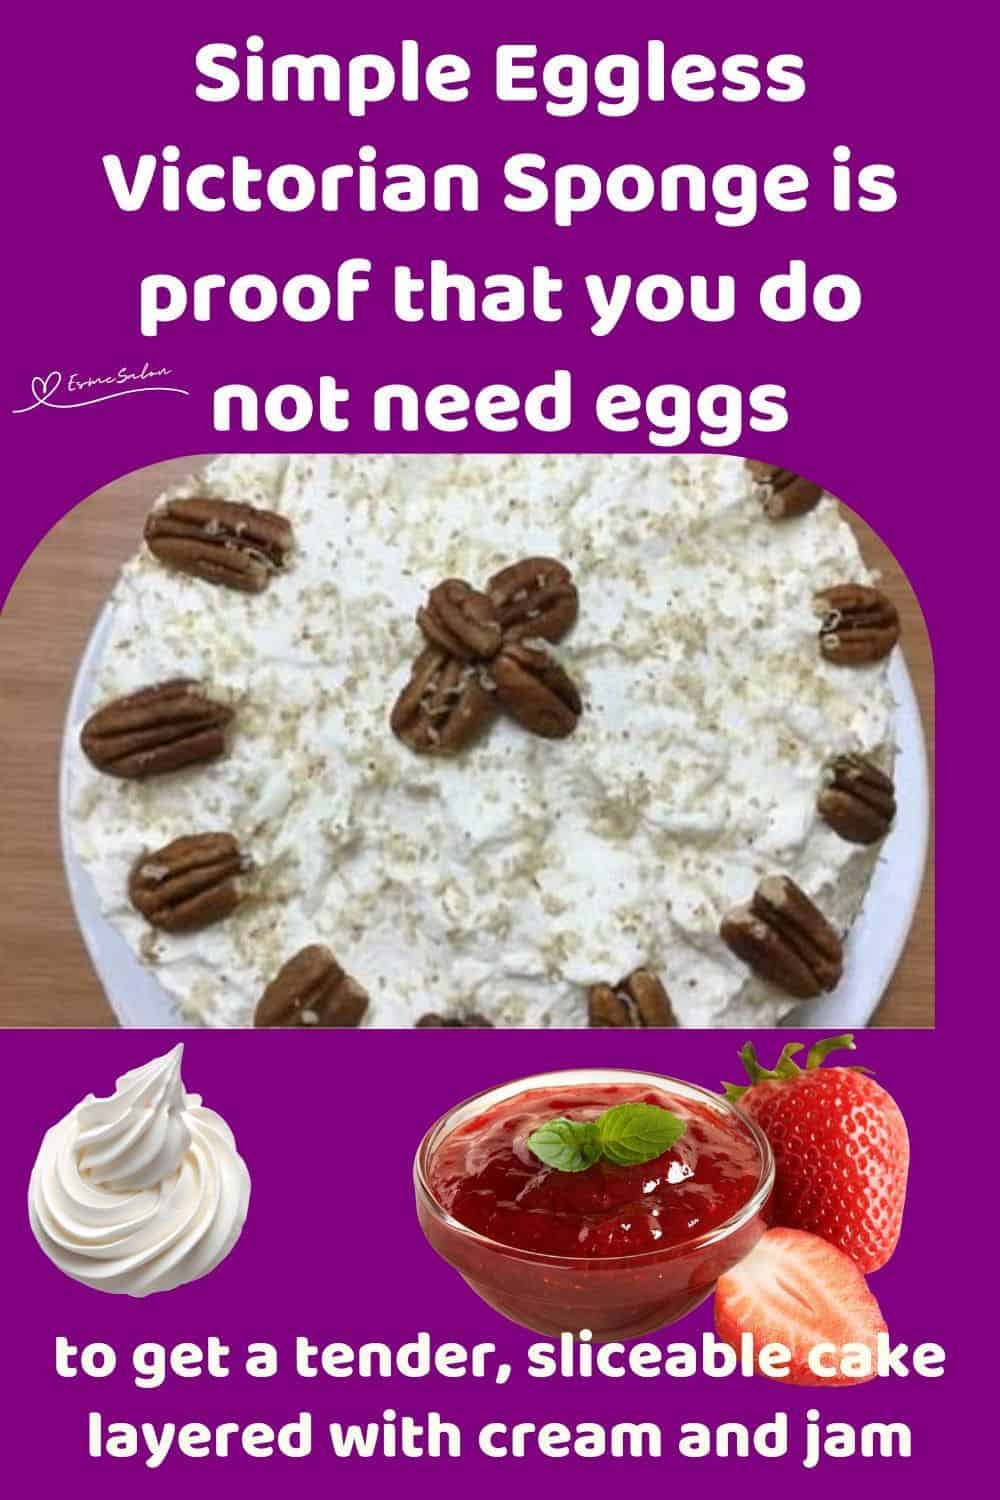
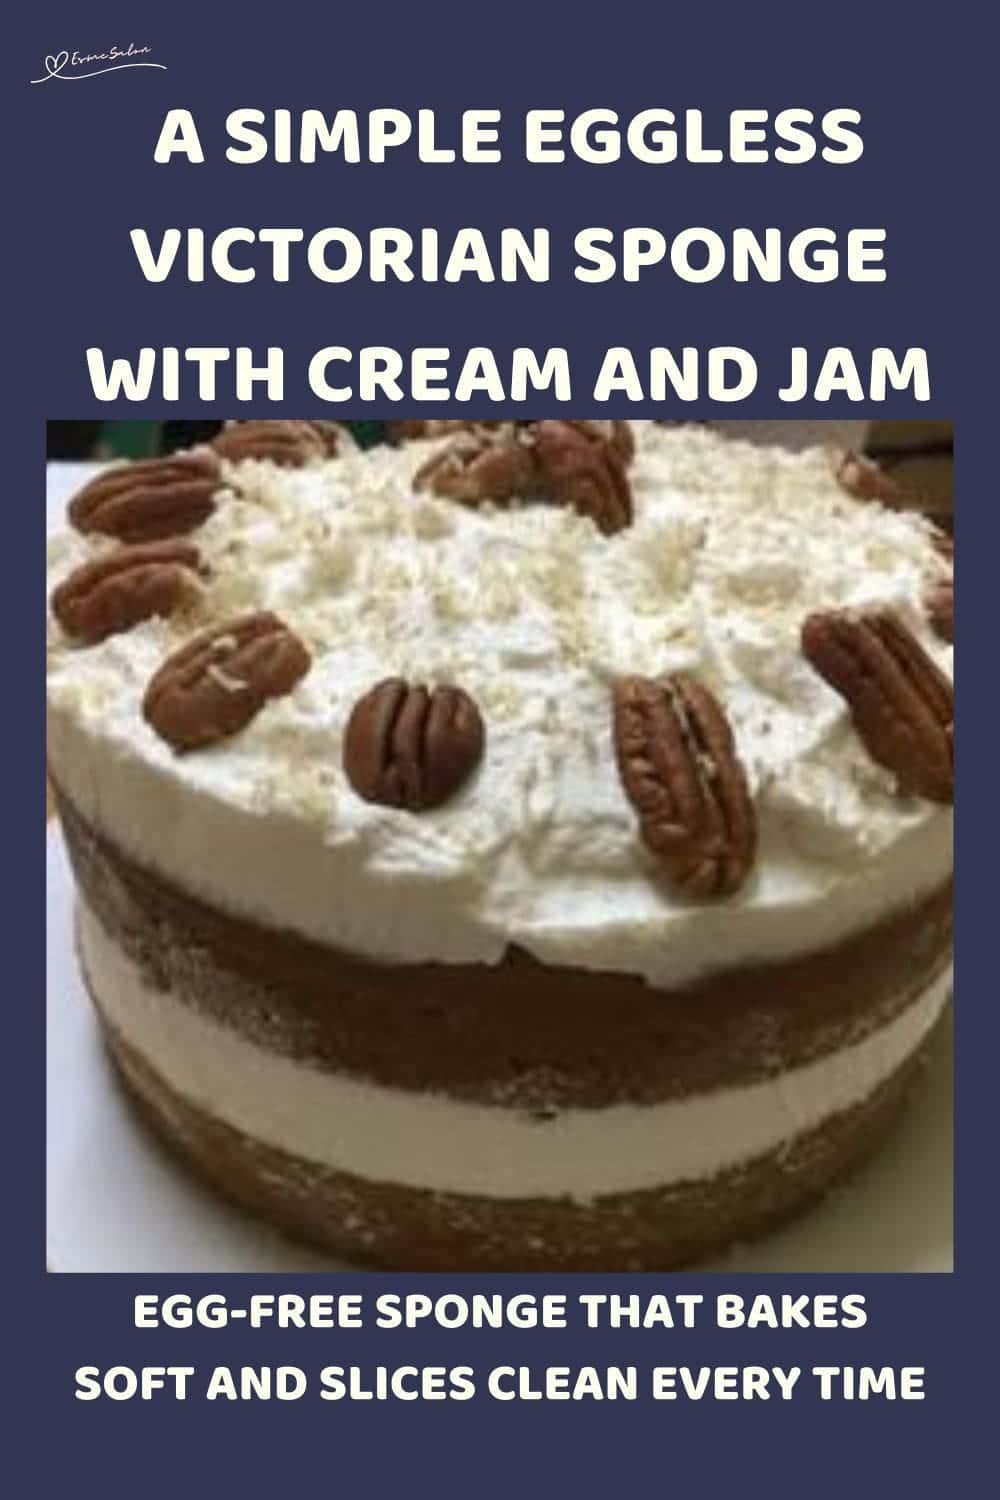
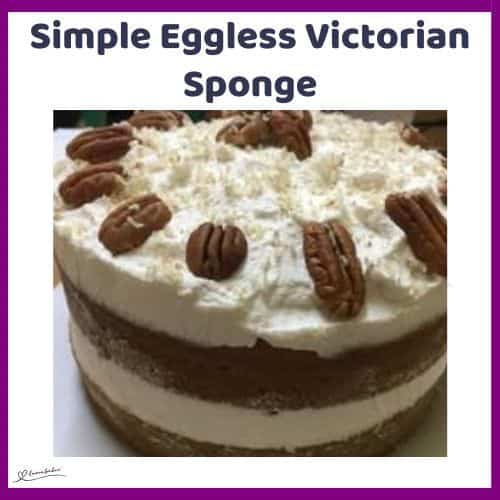
There is something comforting about a well layered sponge filled with cream and jam. Simple Eggless Victorian Sponge keeps that classic feel while staying easy and egg-free.
Ingredients
Units
Scale
Sponge layers (make twice):
- 2 cups cake flour
- 1 cup castor/caster sugar
- 1 tsp bicarbonate of soda
- 1/4 tsp salt
- 1 cup tap water, room temperature
- 1/2 cup oil
- 1 tbsp white wine vinegar
- 1 tsp vanilla essence
Fresh cream icing:
- 1 cup whipping cream, cold
- 1 cup icing sugar, sifted, add more if you like it sweeter
Filling and topping:
- Strawberry jam, about 1/2 cup
- Nuts, as needed
Instructions
- Preheat your oven to 180°C.
- Grease and line the base of a 20 cm round cake tin with baking paper. This cake is soft, so lining really helps when turning it out.
- In a bowl, stir together 1 cup castor/caster sugar, 1 cup tap water, 1/2 cup oil, 1 tbsp white wine vinegar, and 1 tsp vanilla essence.
- Keep stirring until the sugar looks mostly dissolved. It does not have to be perfect, just no gritty puddles at the bottom.
- In a separate bowl, sift together 2 cups of cake flour, 1 tsp of bicarbonate of soda, and 1/4 tsp salt. Don’t skip the sifting; it keeps the sponge light.
- Pour the wet mixture into the dry ingredients.
- Gently whisk or stir just until smooth. Don’t overmix here; stop as soon as you don’t see dry flour.
- Pour the batter into the prepared tin and tap it lightly on the counter to release air bubbles.
- Bake at 180°C for about 20 mins, or until a cake tester comes out clean and the top springs back when lightly touched.
- Let the cake cool in the tin for 10 mins, then turn it out onto a rack to cool completely.
- Repeat the entire sponge recipe to make the second layer.
- Fully cooled cakes are easier to layer and won’t melt the cream.
Fresh Cream Icing
- In a cold bowl, whisk together 1 cup whipping cream and 1 cup icing sugar until thick and stiff.
- Start slow, then increase speed. Stop as soon as it holds soft peaks so it doesn’t turn grainy.
Assemble the Cake
- Place one sponge layer on a serving plate.
- Dollop on some of the whipped cream and spread it evenly, right to the edges.
- Spoon over the strawberry jam and gently spread it on top of the cream.
- Add the second sponge layer.
- Spread the remaining whipped cream over the top.
- Finish with nuts or grated nut shavings for a simple, classic look.
- Chill the cake for about 30 minutes before slicing if you want neat layers.
Notes
Created, prepared, tried, and tested by Ureshani