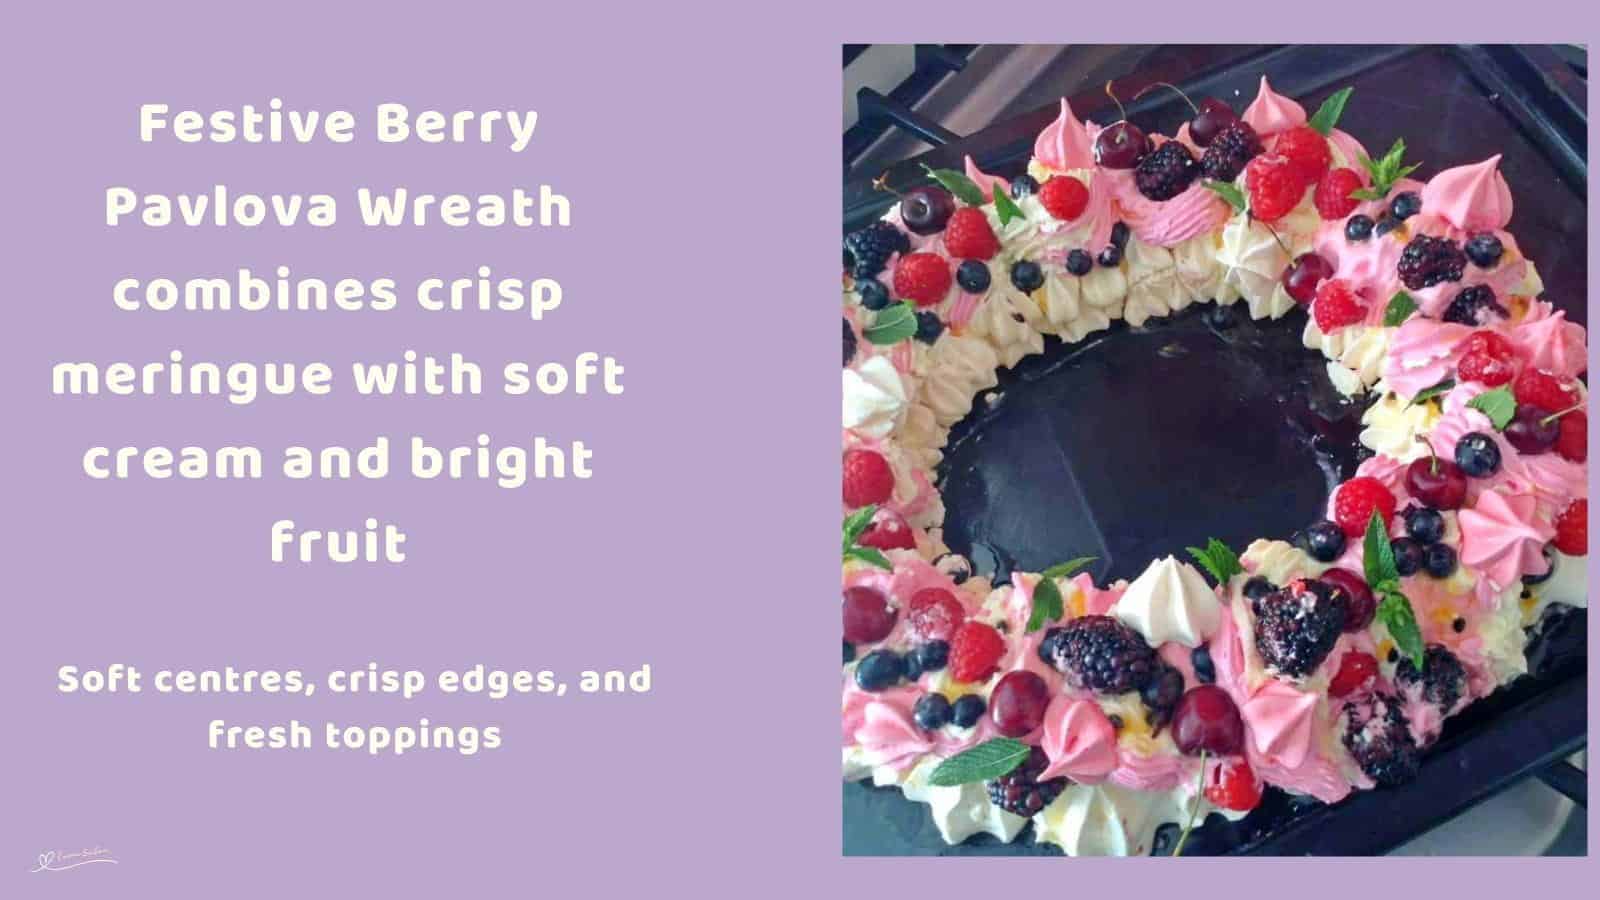
Festive Berry Pavlova Wreath brings together crisp meringue, soft cream, and bright berries. It’s a dessert that feels just right for gatherings.
A Festive Berry Pavlova Wreath topped with whipped cream, marshmallow frosting, and fresh berries.

Why you will love and enjoy this Festive Berry Pavlova Wreath:
- Light, crisp, and not overly sweet with fresh fruit balance
- Looks impressive but is surprisingly simple once you start
- Perfect make ahead dessert for gatherings and holidays
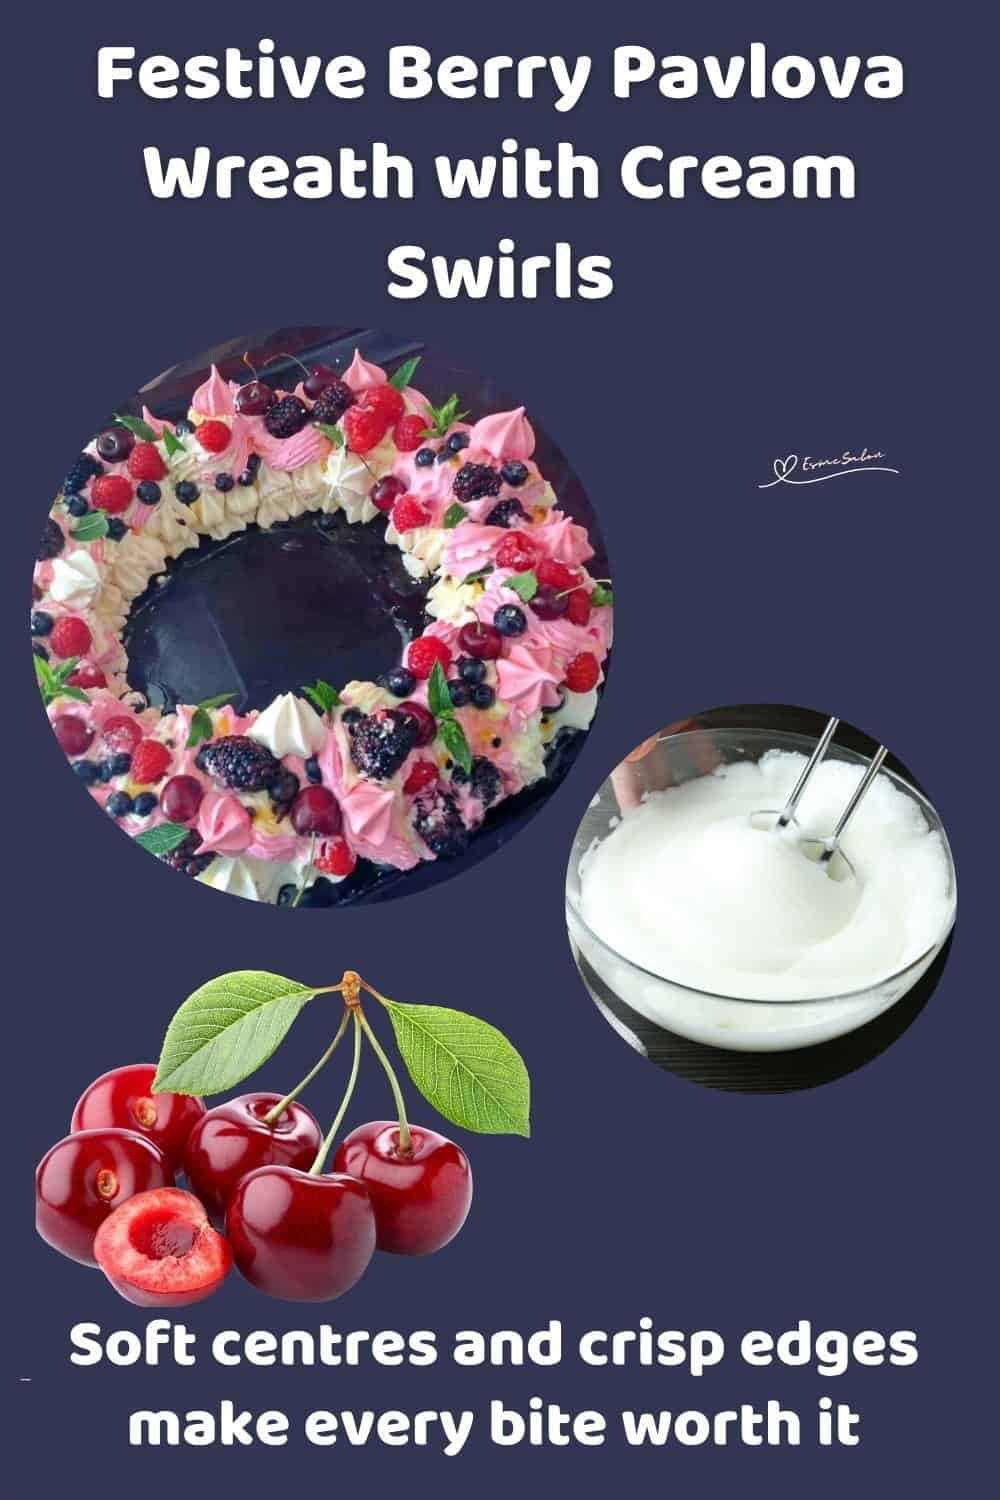
Crisp meringue with whipped cream and marshmallow swirl.
Print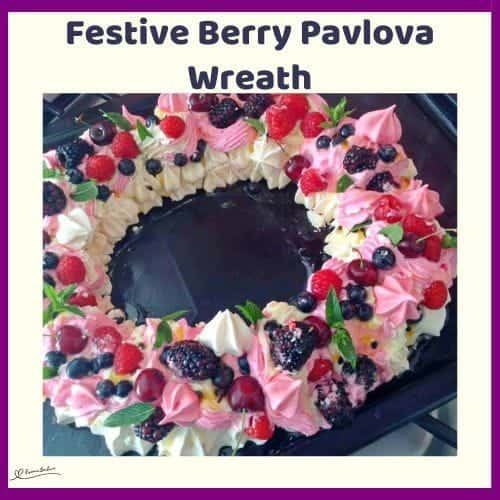
Festive Berry Pavlova Wreath
- Prep Time: 30 minutes
- Resting Time: 12 hours
- Cook Time: 2 hours
- Total Time: 14 hours 30 minutes
- Yield: 1 large pavlova wreath + extra mini meringues 1x
- Category: Desserts
- Method: Moderate Baking
Description
This pavlova wreath is light, crisp, and just a little dramatic on the table. It’s the kind of dessert that looks fancy but is actually quite forgiving.
Ingredients
Meringue:
- 300 g egg whites (about 6 to 7 eggs, depending on size), room temp
- 300 g castor sugar
- 300 g icing sugar, sifted
Toppings:
- 250 ml fresh cream
- 1 x 199 g marshmallow frosting mix
- 5 ml strawberry essence
- 1 drop crimson food colouring
- Fresh red currants
- Fresh cherries, pitted
- Fresh blackberries
- Fresh blueberries
- Fresh mint sprigs
- Granadilla pulp
- Extra icing sugar, for dusting
Instructions
- Preheat your oven to 185⁰F (85⁰C).
- Line a baking tray with parchment paper and lightly draw a dinner plate-sized circle as your guide.
- In a clean stand mixer bowl, beat 300 g egg whites on medium speed until soft peaks form, and you start to see thin cords. Don’t rush, take your time.
- Turn the speed down to low and slowly add the 300 g castor sugar, one scoop at a time.
- This should take about 4 to 5 minutes. The mixture should thicken and look glossy.
- Using a spatula, gently fold in the 300 g sifted icing sugar.
- Take a moment to rub a bit between your fingers. If it feels grainy, keep folding lightly until smooth and glossy.
- Spoon the meringue into a piping bag fitted with a star nozzle (no. 867 works beautifully).
- Pipe swirls in a ring following your drawn circle. Build it up slightly for height.
- Pipe extra small meringues on a separate lined tray.
- If you’d like, tint a portion of meringue with a drop of crimson food colouring and pipe pink ones too.
- Bake at 185⁰F (85⁰C) for 2 hours.
- Then switch the oven off and leave the pavlova inside overnight to dry out completely. Don’t open the door.
- The next day, whip 250 ml fresh cream until stiff peaks form. Be careful not to overwhip, you do not want butter.
- Prepare the 199 g marshmallow frosting mix according to package instructions.
- Mix in 1 tsp strawberry essence and a tiny drop of crimson food colouring for a soft pink tone.
- Place the whipped cream and marshmallow frosting into separate piping bags, then tuck both into a larger ziplock bag.
- Snip the corner and pipe swirls around the pavlova for a two-tone effect. It’s a bit messy, but that’s part of the charm.
- Decorate with red currants, cherries, blackberries, blueberries, and a few mint sprigs.
- Spoon over a little granadilla pulp for a tart finish.
- Add the mini meringues on top and finish with a light dusting of icing sugar.
Notes
Created, prepared, tried, and tested Gail
A pavlova wreath that’s as fun to make as it is to serve. It’s crisp, airy, and finished with fresh fruit

Festive Berry Pavlova Wreath is the kind of dessert that draws attention the moment it’s set down, with its crisp shell and soft centre layered under cream and fresh fruit. It offers just enough sweetness balanced by tart berries and light textures, making it easy to go back for another slice without feeling heavy.
I am linking up with a bunch of fantastic peeps from the blogosphere who host awesome Link-ups: Fiesta Friday
We are featured on Busy Monday at A Pinch of Joy! Thank you so much for this honour and the shoutout.
Thanks for dropping in and checking out the recipes and what’s on offer.
Thanks for dropping in and checking out the recipes and what’s on offer.
If you try out this delightful recipe, please let me know, rate it, and tag me on Instagram at @_esmesalon. I’m excited to see your amazing recreations, and I’m hooked on those mouthwatering photos!
We happily share our tasty and fantastic recipes and are excited to spread some love by sharing our posts at these awesome Linky Parties.


Copyright © 2026 esmesalon.com – All rights reserved.

Oh my that looks delicious! Almost too much to eat!! Thanks so much for commenting on my Easter Sugar Egg and inviting me to peek at your own party links. I am pinning this one for sure!!
Kim, I hope you do give it a go at some point in time. It’s so pretty and festive, and can be adapted for Easter, Christmas or any other occasion.
wow … awesome!
Yes, it seems like we’re getting ready for Christmas – Just love all these Christmas contributions from my FB group members
😊